How to Practice Good Media Management on Any Budget
- Chris Salters
- Oct 8, 2018
- 8 min read
Digital media has revolutionized the way we shoot, edit, and deliver. I’m sure many of you reading this can remember digitizing and laying back tapes. Some might even remember splicing film together.
Luckily, the future has arrived, but still, working with digital media presents its own set of challenges, especially when moving through the production to post-production pipeline. It’s easy to fall into traps of simply copying, pasting, and storing media on a hard drive. If you’re doing this for a living with clients or other stakeholders that have large investments at stake, you need a more robust system.
But performing A-list media management isn’t cheap or trivial. There is a happy middle ground though. Let’s look at some basics of a good media management workflow and how to implement that workflow on a low budget.
The Workflow Problem
Let’s first look at what a typical workflow might look like for a low-budget production. Maybe this is a short indie film, corporate video, or local TV ad.
First, there’s the shoot. It can happen on a large assortment of cameras (which all have their own intricacies), but you will ultimately end up recording media onto some form of integrated or attached digital storage (e.g. SD cards, hard drives, etc.) After shooting wraps, the media is then copied to an external or local hard drive where it is also edited, rendered, exported, and delivered. Once delivered, it’s copied to an ‘archive’ hard drive and thrown on a shelf to be forgotten, if the project is archived at all.
I’ll be the first to say that yes, this can get the job done. The problem is that this style of media management opens your project up to all kinds of vulnerability and inefficiencies.
Before diving into budget-friendly media management, let’s look at how a professional production might handle its media.
High-Level Media Management
Workflows for large productions and studios are typically custom, all depending on their size, equipment used, and turn around time needed. That said, let’s consider a basic shoot for a national TV ad through an ad agency.
Production
As the shoot progresses and camera media fills up, it’s time to transfer the footage to external storage. A standard procedure is to dump footage to two separate RAID 1 hard drive systems via offloading software like Shotput Pro.
Why two RAIDs? Dual copies provide a master and backup in the event that one is lost, stolen, or broken. On top of that, RAID 1 means that each box stores two exact copies of the media on two separate internal hard drives, which provides an extra layer of redundancy.
Dedicated offloading software is used to manage the transfer from camera to external drives because it tracks what is moved, byte for byte, in order to make sure that no errors were made during the copying process. At the end of the transfer, the program runs an Md5 checksum on both copies to ensure there are no discrepancies between the source and destination files. Additionally, Shotput Pro can track multiple offloads at the same time, making the data transfer more efficient.


Big Budget Media Drives & Offloading Software
– Shotput Pro: $130
Takeaway: Use redundant backups and offloading software to prevent losing footage.
Post-Production
Once the RAID drives arrive at a post facility, the media is offloaded to a network attached storage (NAS)/storage area network (SAN) or a dedicated high-capacity external RAID. NAS/SANs provide large amounts of storage at high bandwidth, so multiple people can access media simultaneously. There are dozens of different configurations for high-performance shared storage, but they nearly all involve some kind of RAID. The configuration of post-production storage is dependent on project complexity, but the balance of cost, redundancy, and speed is the main question.
Project files (work in progress from the NLE) are kept on drives separate from the media drives, and are backed up at least once a day. For example, a local project file on an editor’s workstation is regularly copied to a server or second hard drive, adding another level of redundancy. This workflow optimizes editing speed, while also creating up-to-date copies of the project files for safety.
Fortunately, project files (the files that store the work-in-progress timelines) are tiny compared to the media files, so it’s pretty easy to back them up frequently.

Big Budget Post-Production Storage Solution
– Studio Network Solutions EVO: $30,000 (estimate)
Medium Budget Post-Production Storage Solution
– G-Speed Shuttle XL TB3: $4,000
Takeaway: Copy media to high-performance storage and practice good project management by backing up project files separately from media files.
Delivery
Many hours of editorial later, the cut reaches its final approval and is delivered. Nowadays, a final product may be a high-quality H.264 MP4, but it is good practice to also export a full resolution file in a high fidelity codec (ex. Prores HQ) with split audio. Having a version of the final video in this type of codec allows for better quality transcodes in the future if it’s called for in the future—like an unanticipated cut-down. Confused on what codec you should be using? This codec comparison guide should help.
Split audio simply means that, rather than a video having a stereo mix of all of the video’s sound, the dialog, music, and effects (DME) are each on their own separate track. Splits also allow for easier manipulation of the final video, like in a cut-down, without having to have access to all of the original video’s source files. For example, you can cut sections of dialogue while still keeping the music bed, or you can re-dub the film in another language.
Takeaway: Always export your final deliverable to a high-quality codec with dialog, music, and effects on separate tracks.
Archiving
Finally, after delivery, the project is placed in cold storage. Workflows vary, but often all project files, media, and delivery files get archived to 2 redundant sets of LTO tapes. LTO is an industry standard archival medium that safely stores data much longer than a hard drive—in excess of 30 years. Many standard hard drives, if simply left on the shelf without being used, can deteriorate in just a few years.
The size of the final project determines how many tapes need to be used, but the latest LTO tapes can hold 12TB of uncompressed data, so most projects could fit on just one or two. The tapes can be standalone or part of a large tape library. As always, redundancy is key.
Each tape set is stored in different geographical locations. While this might seem extreme, there are several companies that charge a low monthly fee for this service. Having one copy on hand at the agency provides easy access, and having another in off-site storage provides peace of mind in case of a disaster like a fire or an earthquake.
Software like BruPE is used to move data from media storage to the LTO tapes. The software’s main function is to write the tapes, but it also keeps an index of everything that it writes. Indexing is an important part of a proper archival procedure, as it makes finding past projects and media very easy. If a client asks for a new version of something months or years down the line, you don’t want to spend hours just finding the right files. Indexing is crucial to avoid that headache.

Big Budget Archiving Solution
– Storage DNA LTO Tape Library: $30,000 (estimate)
Medium Budget Archiving Solution
Takeaway: Archiving should use long-term solutions, like LTO, not short-term hard drives.
Media Management for Low Budgets
Having piles of cash makes it easy to manage media “properly”, but how does that help a low-budget filmmaker? It’s a fair question, but we can take away major lessons from what large productions do. The biggest of all is that everything needs a backup in case catastrophe strikes. So what does that look like?
Production
Offload footage during/after the shoot to 2 separate hard drives—either 7200rpm or solid state for sufficient speed. If you don’t have the funds to invest in Shotput Pro, you can alternatively use Red Giant’s Shooter Offload ($99) or DaVinci Resolve (for free) to perform the offloading. Resolve’s features are more limited, but it can handle the transfer needs of most projects.

Keep those two hard drives physically separate immediately after the shoot (send one over to your editor and then keep the other yourself). There are plenty of stories of a newbie DIT who puts both copies in the same bag, and then the bag gets stolen.
Low Budget Media Drives
– (2x) G-Drive USB Drives: $140 per
Post-Production
Prior to starting the edit, offload the footage to a local RAID or hard drive, separate from where you’ll be storing and working on project files. Are you really strapped for cash? Well if you’re truly in a pinch, you can edit from one of the duplicate media drives from the original on-set dump. This isn’t advisable, since you’re increasing the odds of storage failure, but sometimes you gotta do what you gotta do.
Note that if you’re working with footage above HD resolution (UHD and above) it will be painful to edit without the help of a RAID. As your skills and production gear improve, you’re going to need to invest in a media system that can keep up. Though of course, using proxies is a fantastic alternative way to get more mileage out of your hardware.
If your media drive kicks the bucket, you don’t want your project files going with it. So, you should keep a backup of your project files in at least one other location. The media drive is fine for keeping the redundant copy, just as long is you keep it up to date.
It can be a great idea to direct your NLE to store its autosaves on a separate drive from the project file. Or, even better, store those autosaves on a folder that’s synced to the cloud via Frame.io’s Watch Folders app or Google Drive/Dropbox. That way, if your computer (with all of its drives) gets stolen, then you’ve still got your project files.

Low Budget Post-Production Storage Raid
– G-Raid w/ Thunderbolt 2: $600
Low Budget Post-Production Storage Drive
– G-Drive USB Drive: $140
Delivery
Deliver the project as specified (let’s assume it’s H.264 MP4.), but don’t stop there. Also export a version in ProRes or ProRes HQ with split audio tracks, so that if you ever return to the project your job will be easier. Not having a professional mix done? Premiere (or any NLE) is entirely capable of creating splits on its own.
Archive
This is arguably the most overlooked aspect of media managing productions, large or small. That’s partially understandable (unless you’re an archivist). The project has wrapped, everyone has received high fives, and it’s time to move on. It’s also a relatively expensive aspect of the process that isn’t seen by many people.
Inevitably though, some project will eventually come back, so you need to be prepared. LTO and optical disc archiving are the two best long-term options currently available for archiving media. You might think that dumping the project, media, and deliverables to a pair of hard drives constitutes an archive, but it doesn’t.
Most external drives are prone to failure of one kind or another. Spinning discs (HDDs) have moving parts that must be spun up from time to time and will still eventually fail. Solid state discs (SSDs) live longer, but their flash memory, capacitors, and power supplies still malfunction. HDDs have a longevity of around 4 years, while SSDs can last around 10. But compared to an LTO tape’s lifespan of at least 30 years, the winner is clear.
Our suggestion for bridging the archiving gap while still keeping to a budget is opt for an older version of LTO. The current version is 8, but you can find LTO 7 or LTO 6 drives new for a substantial discount. Used drives are also a great budget saver, but keep in mind you’ll need to also purchase tape media for the drive.
If you can’t afford the LTO route and still opt for ‘archiving’ to multiple hard drives, I would suggest Mac users pick up a copy of Alorsoft’s Media Indexer. It is a lightweight program that lets you index hard drives and retain the ability to search through their files (names only) without the drive being attached to the computer. At this time we are unaware of a Windows alternative.
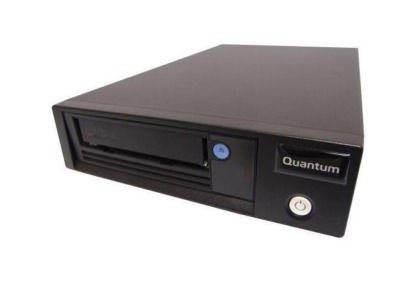
Medium to Low Budget Archiving Solution
– Quantum LTO6HH Tape Drive: $1,550
– BruPE: $500
Low Budget Media Indexer (Mac Only)
– Alorsoft’s Media Indexer: $18 (plus hard drives)
Go Create
Media management may not be the most glamorous part of the job, but it’s a necessary chore. Yes, larger budgets can afford more tech, but ultimately good media management comes down to good planning and bulletproof workflows. Even the smallest budgets can put these lessons into practice.
Don’t take your footage for granted, and don’t risk your reputation. You should always play it safe with redundant backups throughout all your project workflows. This sort of well-planned redundancy will let you get back to the fun part of video, and keep you from losing sleep over whether or not your media will survive the process!


